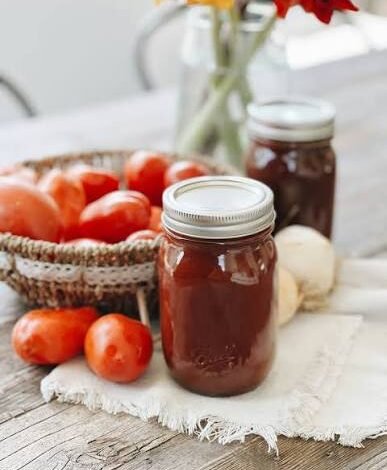
Making your own canned barbecue sauce at home is a fantastic culinary project that brings rich flavor and pure satisfaction right into your kitchen. When you create this sauce from scratch, you take full control of every single element that goes into your glass jars, leaving behind all the artificial preservatives, high fructose corn syrup, and mysterious additives found in commercial bottles. Canned barbecue sauce captures the robust essence of sweet tomatoes, bold spices, tangy vinegar, and deep molasses, locking all those vibrant flavors together through a gentle hot water bath canning method. The process turns basic pantry staples into a smooth, glossy, aromatic condiment that tastes infinitely better than anything you can buy at a grocery store. Having a row of homemade sauce jars sitting proudly on your pantry shelf gives you instant access to incredible flavor whenever you decide to light up the grill or cook a quick weeknight dinner for your family.
People absolutely adore this homemade barbecue sauce recipe because it strikes the ultimate balance between deep sweet notes and mouthwatering savory spices. The natural richness of tomato paste pairs seamlessly with warm brown sugar, dark molasses, and smoky paprika, creating a harmonious blend that coats your food perfectly without running off. Food lovers everywhere appreciate the thick, glossy texture that clings to grilled chicken wings, tender pork ribs, juicy burgers, and roasted vegetables. Beyond the unbelievable taste, there is a profound sense of pride and joy that comes from popping open a jar you preserved with your own hands. The irresistible aroma that fills your kitchen while the sauce simmers gently on the stove creates an inviting environment that brings family members straight to the dinner table, eager to sample a fresh spoonful.
This preserving project is ideal for making during the late summer months when fresh tomatoes are abundant, or during early autumn when you want to prepare your pantry for the cozy months ahead. Making this sauce is deeply emotional for many home cooks because it evokes cherished memories of backyard summer cookouts, family gatherings, and festive weekend dinners under the warm sun. It is also a smart choice for health conscious individuals who want to monitor their sodium intake, avoid unnecessary artificial colors, and control the exact amount of refined sugar in their food. Preparing a large batch saves you both time and money during busy weeknights, allowing you to turn simple baked chicken breasts or slow cooked shredded meat into a meal that tastes like it came directly from a professional pitmaster.
You should make a big batch of this canned barbecue sauce whenever you want to give thoughtful, homemade gifts to your neighbors, friends, or family members during special holidays and summer block parties. Handing someone a beautifully decorated jar filled with rich, flavorful sauce shows genuine care and effort that store bought items simply cannot match. It is also an extraordinary solution for meal prepping, since having ready to use jars on hand means you can whip up delicious dinners without spending hours over a hot stove after a tiring workday. Whether you are aiming to eat cleaner, cut down on processed groceries, or simply enjoy the comforting experience of home canning, this recipe offers the ideal balance of health benefits, financial savings, and unmatched taste.
Ingredients You Will Need
-
Tomato paste: four cups
-
Tomato sauce: four cups
-
Dark brown sugar: two cups
-
Dark molasses: one cup
-
Apple cider vinegar: two cups
-
Water: two cups
-
Worcestershire sauce: half a cup
-
Smoked paprika: four tablespoons
-
Garlic powder: three tablespoons
-
Onion powder: three tablespoons
-
Yellow mustard powder: two tablespoons
-
Chili powder: two tablespoons
-
Sea salt: two tablespoons
-
Black pepper: one tablespoon
-
Red pepper flakes: one teaspoon
Step by Step Method
-
Clean and inspect all your glass canning jars, metal lids, and screw bands to make sure there are no chips, cracks, or rust anywhere on the equipment. Wash everything thoroughly in hot, soapy water, then rinse the jars clean with warm water. Place your clean jars inside a large canning pot filled with water and bring it to a gentle simmer so the jars stay warm while you prepare the sauce. Keeping the jars warm prevents them from cracking when you pour hot liquid inside later.
-
Take out a large, heavy bottomed stainless steel stockpot and place it on your stovetop over medium heat. Pour in the tomato sauce, tomato paste, water, and apple cider vinegar, then stir continuously with a long wooden spoon until the mixture is smooth and completely combined.
-
Add the dark brown sugar and dark molasses into the pot, stirring steadily until the sugar crystals melt completely into the warm tomato mixture.
-
Measure out the Worcestershire sauce, smoked paprika, garlic powder, onion powder, yellow mustard powder, chili powder, sea salt, black pepper, and red pepper flakes, then sprinkle them evenly into the liquid.
-
Whisk the entire sauce mixture thoroughly to break up any dry spice clumps and ensure all the rich seasonings are evenly distributed throughout the batch.
-
Turn the heat up to medium high and bring the barbecue sauce to a rolling boil, stirring frequently to prevent the bottom from scorching or sticking to the pot.
-
Once the sauce reaches a solid boil, reduce the burner heat down to low so the liquid maintains a soft, gentle simmer.
-
Cover the pot loosely with a lid, leaving a small gap for steam to escape, and let the sauce simmer gently for about forty five minutes. Stir the mixture every ten minutes to keep the texture uniform and smooth.
-
While the sauce is simmering, fill your water bath canner about halfway with fresh tap water, place the internal rack at the bottom, and start heating the water over medium heat.
-
Carefully remove the warm jars from the hot water bath using a sturdy jar lifter tool and set them down on a clean, folded kitchen towel on your countertop.
-
Place a wide mouth canning funnel on top of the first jar and carefully ladle the hot barbecue sauce into the jar, leaving exactly half an inch of empty space at the top, which is called headspace.
-
Repeat the ladling process for all your warm jars until all the delicious sauce is measured out evenly.
-
Take a clean, non metallic spatula or a plastic bubble remover tool and slide it gently down the inside edges of each jar to release any trapped air bubbles that might be hiding in the thick sauce.
-
Recheck your headspace measurement after removing air bubbles, adding a tiny bit more sauce if necessary to keep it at half an inch.
-
Dip a clean paper towel into warm water or white vinegar and wipe the top rim of every jar completely clean, removing any small drops of sauce so the rubber seals on the lids can make direct, perfect contact with the glass.
-
Center a flat, clean metal lid onto the top of each jar, then place a metal screw band over the lid and twist it down with your fingers until it is fingertip tight, avoiding overtightening.
-
Use your jar lifter tool to gently lower the filled jars one by one into the canner rack, ensuring the jars remain upright and do not touch each other directly.
-
Check that the hot water inside the canner covers the tops of all the jars by at least one to two full inches, adding more boiling water if the water level is too low.
-
Place the heavy lid securely onto your water bath canner and turn the stove burner up to high heat until the water reaches a full, vigorous boil.
-
Set a timer for twenty minutes once the water is boiling rapidly, keeping the canner covered tight the entire time to maintain a constant temperature.
-
When the twenty minute processing time is finished, turn off the heat completely and carefully remove the canner lid, letting the steam escape away from your face.
-
Allow the jars to sit undisturbed inside the hot water for five extra minutes so the pressure inside the glass stabilizes naturally.
-
Use your jar lifter to lift the hot jars straight up out of the water without tilting them, placing them onto a thick towel in a draft free area on your kitchen counter.
-
Let the jars cool down completely at room temperature for twelve to twenty four full hours without moving them or pressing down on the centers of the lids.
-
Listen for the satisfying, high pitched ping sound as the cooling lids flex downward and seal tightly against the glass rims.
-
After twenty four hours, test the center of each lid by pressing it with your finger; if the lid stays firm and does not flex or pop up, your seal is successful.
-
Remove the screw bands, clean the outside of the glass with a damp cloth, label each jar with the date and contents, and store your canned sauce in a cool, dark pantry for up to one full year.
Why This Recipe Is Special
This canned barbecue sauce recipe stands out because it strikes an ideal harmony between bold flavor and reliable home food safety. By using the natural acidity of tomato products and pure apple cider vinegar, this sauce reaches a safe acidity level that allows you to preserve it securely using a simple hot water bath canner instead of needing complex pressure equipment. You never have to worry about mysterious chemicals, high amounts of excess salt, or low quality corn syrup filling up your food because every single ingredient is fresh, natural, and recognizable.
From a wellness perspective, making your sauce at home gives you complete freedom to tailor the ingredients to fit your family’s personal nutritional goals. You can effortlessly adjust the sodium levels by reducing the sea salt, or swap out part of the sweetener if you prefer a lower calorie option. Tomatoes are naturally packed with lycopene, a potent antioxidant that supports heart health, while spices like garlic, paprika, and ginger bring anti inflammatory properties to every spoonful. Enjoying this homemade condiment means you get all the incredible savory taste you crave while making a healthier, cleaner choice for your body.
Extra Tips for Better Taste
-
Add a drop of natural hickory liquid smoke into the pot if you want an intense, open pit barbecue aroma without spending hours over real wood embers.
-
Puree a small amount of roasted garlic bulbs and mix it into the sauce base for a smooth, sweet, and deep savory flavor profile.
-
Use fresh pineapple juice in place of half the water if you enjoy a tropical twist that balances smoky spices with natural fruit sweetness.
-
Stir in a tablespoon of crushed chipotle peppers in adonis sauce if you want to turn up the spicy heat and add a deeper smoky layer to your batch.
-
Allow your sealed jars to rest in the dark pantry for at least two weeks before opening the first one, which gives the complex spices plenty of time to meld together fully.
Final Thoughts
Preserving your own canned barbecue sauce is a rewarding, empowering kitchen hobby that brings endless delicious benefits to your dining table. Watching ordinary pantry staples transform into a rich, velvety condiment that fills your home with comforting aromas is an absolute delight from start to finish. Once you experience the depth of flavor packed into these beautiful glass jars, you will never want to go back to buying commercial bottles at the supermarket. Stocking your pantry with this incredible homemade creation ensures that great taste, heartfelt warmth, and healthy eating are always within easy reach for every family meal.
Nutrition Details
| Nutrient | Amount Per Serving |
| Serving Size | 2 tablespoons |
| Calories | 45 |
| Total Fat | 0 grams |
| Saturated Fat | 0 grams |
| Trans Fat | 0 grams |
| Cholesterol | 0 milligrams |
| Sodium | 280 milligrams |
| Total Carbohydrates | 11 grams |
| Dietary Fiber | 1 gram |
| Sugars | 9 grams |
| Protein | 1 gram |
Disclaimer
Everyone’s body is unique, and individual dietary needs or health responses may vary based on personal medical history, active conditions, or specific lifestyle factors. The nutritional figures and wellness insights provided in this article are meant for general educational purposes only and should not replace individual advice from a licensed medical professional or certified nutritionist. Always follow verified home canning safety guidelines carefully to ensure proper food preservation in your kitchen.