Making homemade sourdough bread is one of the most rewarding experiences you can have in your kitchen, but many traditional methods require constant attention and endless hands on work. This special recipe introduces you to unloaf sourdough bread made completely without stretch and folds, which means you can enjoy fresh and healthy bread without spending your whole day watching over a bowl of dough. Many people feel intimidated by classic bread making because they think they need to spend hours pulling and folding dough every thirty minutes, but this gentle method uses time and natural fermentation to do all the heavy lifting for you. You will discover that simple ingredients like active starter, plain flour, pure water, and salt can transform into a beautiful loaf with a crisp crust and a soft interior. It is the perfect recipe for anyone who wants authentic homemade sourdough without the stress, fuss, or complicated techniques that usually turn beginners away from baking.
People absolutely love this unloaf sourdough bread method because it gives them total freedom in their busy daily routines while still delivering incredible quality and rich flavor. Traditional baking recipes often force you to stay in the kitchen for hours, making it nearly impossible to bake bread if you have a full time job, kids to care for, or errands to run throughout the day. With this effortless approach, you simply mix the wet and dry ingredients together in a bowl until no dry flour remains, and then you leave it alone to rise naturally on your counter or inside your refrigerator. The long and slow fermentation process creates deep flavor notes and marvelous air pockets without you ever having to stretch, fold, or knead the dough a single time. Bakers of all skill levels love how forgiving this process is, making it a reliable staple that consistently turns out delicious, golden loaves with minimal effort.
You should make this lovely sourdough bread whenever you want to bring warmth, comfort, and amazing smells into your home while nourishing your body with simple whole ingredients. Biting into a fresh slice of homemade bread coated with rich butter or sweet jam brings a deep feeling of emotional cozy comfort that store bought loaves simply cannot match. From a health and fitness perspective, true sourdough is much easier on your stomach because the natural wild yeast and good bacteria gently break down the gluten and phytic acid during the long rest. This means you get a bread that is friendlier for your digestion, keeps your energy steady, and provides clean nourishment without artificial preservatives or hidden sugars. Whether you want to prepare a healthy toast for your morning routine, make satisfying sandwiches for lunch, or present a beautiful rustic gift to a neighbor, this easy bread recipe fits every occasion.
Taking control of your daily food choices starts with simple changes, and learning to make your own bread is one of the very best steps you can take for your family. When you bake this no stretch sourdough, you know every single ingredient that goes into your body, which creates a wonderful sense of pride and peace of mind. It allows you to slow down and appreciate the slow beauty of natural baking while keeping your hands free to focus on work, hobbies, or spending quality time with the people you love most. Sourdough baking used to feel like a high pressure science project, but this simplified method returns it to what it was always meant to be, a simple, nourishing, and joyful everyday tradition. Once you experience how easy it is to mix a bowl before bed and bake a golden loaf the next day, you will never want to buy commercial bread again.
Ingredients You Will Need
To make this simple and delicious unloaf sourdough bread, prepare the following fresh ingredients using precise measurements:
- Active sourdough starter: 100 grams (bubbly and well fed)
- Warm water: 350 grams (filtered water works best)
- Bread flour or unbleached all purpose flour: 500 grams
- Fine sea salt or kosher salt: 10 grams
Step by Step Method
Preparing Your Starter and Mixing the Dough
Start by making sure your sourdough starter is active, healthy, and bubbly. Feed your starter about four to six hours before you plan to mix your dough so it reaches its peak activity. Take a large glass or ceramic mixing bowl and pour in 350 grams of warm water. Add 100 grams of your active starter directly into the water. Use a spoon or a whisk to gently stir the starter and water together until the liquid looks milky and smooth.
Next, add 500 grams of bread flour and 10 grams of fine sea salt directly into the bowl. Bread flour is recommended because it contains more protein, which helps the bread build a strong structure without any kneading or stretching. Use a sturdy wooden spoon or a spatula to mix everything together. Keep stirring until all the dry flour is completely combined with the liquid and you have a shaggy, wet dough. Make sure there are no pockets of dry flour left at the bottom of the bowl.
The Hands Off First Rise
Once your dough is thoroughly mixed, scrape down the sides of the bowl. Cover the bowl securely with plastic wrap, a damp kitchen towel, or a tight fitting lid. Now comes the absolute best part of this recipe: you do not need to do any stretch and folds at all. Simply place the covered bowl in a warm spot on your kitchen counter and leave it completely alone.
Allow the dough to rest for eight to twelve hours at room temperature. The exact time will depend on how warm your kitchen is during the day or night. Over this time, the wild yeast will slowly eat the sugars in the flour, creating gas bubbles that inflate the dough and build a strong gluten web naturally. By the end of this long rise, your dough should double in size, look puffy, and show small bubbles across the top surface.
Shaping the Bread Gently
After the long room temperature rise, lightly dust your clean kitchen counter with flour. Gently tip the bowl upside down and let the soft dough slide out onto the flour surface. Do not press hard or knock out all the air pockets that formed during the rise.
Using floured hands, gently lift the edges of the dough and pull them toward the center to form a smooth round ball or an oval shape. Flip the dough over so the smooth side is facing up. Gently cup your hands around the base of the dough and pull it toward you across the counter to build light surface tension on the outer skin.
The Second Rise
Prepare a proofing basket or a medium sized bowl by lining it with a clean cotton kitchen towel. Dust the inside of the towel generously with rice flour or regular flour so the wet dough will not stick to it. Carefully lift your shaped dough ball and place it upside down into the lined basket, so the smooth side rests against the bottom of the towel.
Cover the basket loosely with a towel or place it inside a plastic bag to retain moisture. Let the dough rest at room temperature for one to two hours until it looks puffy and passes the gently poke test. Alternatively, you can place the covered basket into your refrigerator for twelve to twenty four hours for an even deeper, tangier flavor.
Baking the Perfect Loaf
Place a heavy Dutch oven pot with its lid inside your oven. Preheat your oven to 450 degrees Fahrenheit (230 degrees Celsius) for at least forty five minutes so the pot becomes extremely hot.
Carefully remove the hot Dutch oven from the main oven using thick oven mitts. Lay a piece of parchment paper on your counter and flip your dough basket onto the paper so the bread lands right side up. Use a sharp razor blade or a very sharp knife to score a swift slash across the top of the dough. This score allows steam to escape so the loaf rises tall and beautiful.
Use the edges of the parchment paper to lift the dough and carefully drop it into the burning hot Dutch oven. Cover the pot with its heavy lid immediately and return it to the oven. Bake with the lid on for thirty minutes. The trapped steam inside the pot will build a crisp, thin crust and help the bread expand to its maximum height.
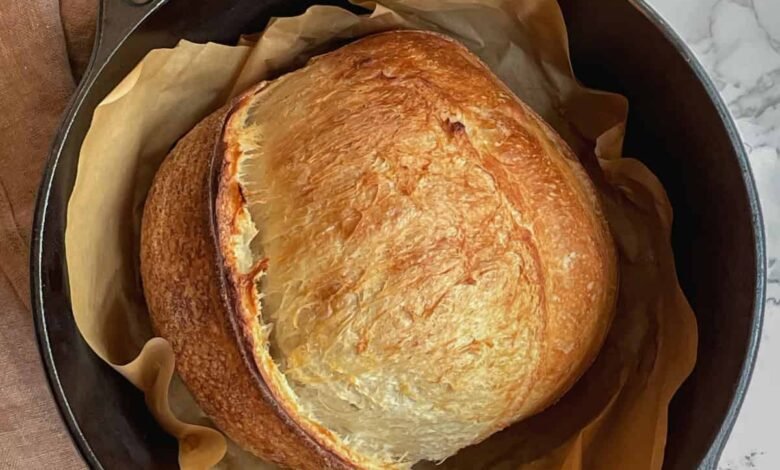
After thirty minutes, carefully remove the lid from the Dutch oven. You will see a pale, beautifully risen loaf. Lower the oven temperature slightly to 425 degrees Fahrenheit (220 degrees Celsius) and continue baking uncovered for another fifteen to twenty minutes until the crust turns a rich, deep golden brown color.
Cooling and Slicing
Once baking is finished, carefully lift the bread out of the hot pot using the parchment paper edges. Transfer the loaf to a wire cooling rack. Resist the strong temptation to slice into the hot bread right away. Slicing too early locks steam inside and can make the inside texture gummy. Let the bread cool completely for at least two hours before slicing with a serrated bread knife.
Why This Recipe Is Special
This unique unloaf sourdough bread method stands out from traditional baking recipes because it saves you time while delivering outstanding quality. By eliminating the constant stretch and fold steps that traditional bakers rely on, this recipe allows anyone with a busy lifestyle to make real, artisan bread from scratch without stress. The secret lies in long, gentle ambient fermentation, which gives time the ability to do the physical labor naturally.
Beyond saving time, this recipe offers remarkable health benefits. Authentic sourdough relies on slow fermentation by natural lactobacilli bacteria and wild yeasts. This natural process breaks down complex starches, phytic acid, and gluten proteins that often cause bloating or digestive discomfort when consuming ordinary store bought white bread. The phytic acid reduction also allows your body to absorb essential minerals like magnesium, iron, and zinc much more effectively.
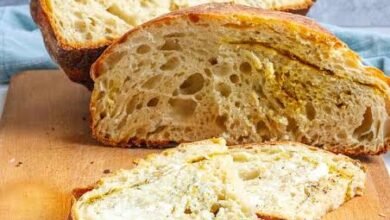
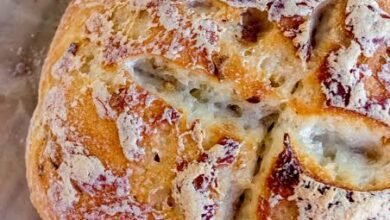
In terms of taste and texture, this effortless loaf rivals any bakery product. The slow rise builds a light, complex sour flavor that enhances every slice. The interior crumb turns out wonderfully soft, moist, and airy, while the Dutch oven steam method guarantees a perfectly crispy and crackly outer crust that holds up to any sandwich spread or soup.
Extra Tips for Better Taste
- Use filtered or non chlorinated water because chlorine found in standard tap water can slow down or kill your natural sourdough starter yeast.
- Mix in roasted garlic cloves and fresh chopped rosemary during the initial mixing phase for a savory and fragrant specialty loaf.
- Add fresh grated cheddar cheese and diced jalapeño peppers into the flour mixture to make a spicy, comforting cheesy bread.
- Swap fifty grams of white bread flour for whole wheat flour or rye flour to introduce a rich, earthy flavor profile to your dough.
- Dust the top of your scored loaf with fine sea salt flakes or sesame seeds right before placing it into the hot Dutch oven for extra crunch and visual appeal.
- Store your cooled sourdough bread cut side down on a wooden cutting board or inside a paper bag to keep the crust crispy for several days.
Final Thoughts
Baking incredible sourdough bread does not have to be a complicated or exhausting chore that takes over your entire day. This simple no stretch and fold method proves that with basic quality ingredients and a little bit of patience, anyone can bake fresh, golden, nutrient rich bread right at home. Give this easy technique a try in your own kitchen, enjoy the wonderfully comforting aroma of fresh baking, and celebrate the simple joy of slicing into your very own homemade creation.
Nutrition Details
The following table provides estimated nutrition facts for the entire recipe as well as for one individual serving slice (assuming the loaf yields twelve slices):
| Calories | 1850 kcal | 154 kcal |
| Carbohydrates | 370 g | 30.8 g |
| Protein | 60 g | 5 g |
| Fat | 5 g | 0.4 g |
| Fiber | 15 g | 1.25 g |
| Sodium | 3900 mg | 325 mg |
| Sugar | 2 g | 0.16 g |
Disclaimer
Every person has a unique body, biological makeup, and digestive system, so individual health experiences and dietary reactions can vary. While sourdough bread made with long fermentation is often easier to digest than regular yeast bread, results may differ from person to person. This article is written for educational and recreational purposes only and should not replace professional medical or nutritional advice.