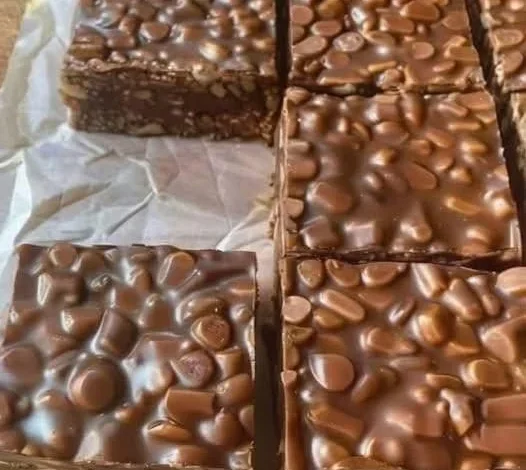
Sourdough discard crunch bars are an absolute game changer for anyone who loves baking at home and hates wasting good food. If you keep a sourdough starter on your counter or in your fridge, you already know the endless cycle of feeding it and throwing away a big portion of the starter discard. It often feels like a sad waste of flour and water, but this clever recipe transforms that leftover unbaked mixture into a crispy, sweet, and deeply satisfying snack. These crunch bars combine the subtle tangy taste of fermented grains with crunchy nuts, healthy seeds, toasted oats, and a touch of natural sweetener like honey or maple syrup. They are chewy, crispy, perfectly golden brown, and packed with wholesome goodness that keeps you full for hours. Whether you are an experienced baker looking for new ways to empty your discard jar or a complete beginner who just started a sourdough journey, this simple recipe will quickly become a weekly favorite in your kitchen.
People absolutely love this recipe because it takes something usually thrown in the trash and turns it into a high quality homemade treat. In a world where grocery store snacks are packed with artificial preservatives, excessive refined sugar, and confusing chemical ingredients, making your own snack bars gives you complete control over what you put into your body. The combination of textures in these crunch bars is incredible, offering a loud satisfying crunch with every single bite while remaining soft enough to chew easily. They are far cheaper to make than store bought granola bars, and you can endlessly customize them using whatever nuts, dried fruits, or seeds you happen to have sitting in your pantry. Families love packing them in lunchboxes, fitness lovers rely on them for quick plant based energy, and home bakers adore how fast they come together with almost zero complicated kitchen tools needed.
You will find so many perfect moments throughout your week to make and enjoy these delicious crunch bars. Emotionally, baking with sourdough discard brings a warm feeling of rustic comfort and mindful kitchen efficiency, knowing you are living zero waste and creating nourishing food from scratch. From a taste perspective, the slight natural sour note of the starter balances out the rich sweetness of honey and melted coconut oil, creating a complex flavor profile that tastes like it came from an upscale local bakery. From a fitness and health standpoint, these bars are a fantastic source of clean energy, dietary fiber, healthy fats, and sustained carbohydrates that will not cause a sudden blood sugar spike. They make an ideal morning breakfast on the go when you are rushing out the door, a great mid afternoon pick me way at your desk, or a powerful pre workout snack before hitting the gym.
Making these bars is also a wonderful way to bring kids into the kitchen and teach them about sustainable cooking habits. Children love measuring out the oats, stirring the sticky mixture, pressing everything flat into the baking pan, and watching the top turn golden in the oven. Because the ingredients are simple and forgiving, you never have to worry about tiny measuring mistakes ruining the final result. The smell that fills your house while these bake is warm, nutty, and comforting, instantly making your home feel cozy and welcoming. Once you see how quickly a tray of these crunch bars vanishes from your counter, you will actually start looking forward to your starter feeding days just so you have enough discard ready to make another fresh batch.
Ingredients You Will Need
-
1 cup sourdough discard at room temperature
-
2 cups rolled old fashioned oats
-
0.5 cup unsalted butter or melted coconut oil
-
0.5 cup honey or pure maple syrup
-
0.5 cup chopped almonds or walnuts
-
0.25 cup pumpkin seeds or sunflower seeds
-
0.25 cup unsweetened shredded coconut
-
0.25 cup mini dark chocolate chips or dried cranberries
-
1 teaspoon vanilla extract
-
0.5 teaspoon ground cinnamon
-
0.25 teaspoon fine sea salt
Step by Step Method
-
Preheat your oven to 350 degrees Fahrenheit or 175 degrees Celsius. Line an 8 inch square baking pan with parchment paper, leaving extra paper hanging over the sides so you can easily lift the bars out later.
-
Spread the rolled oats, chopped nuts, pumpkin seeds, and shredded coconut evenly on a large rimmed baking sheet. Place the tray in the warm oven for about 8 minutes to gently toast the dry ingredients until they smell warm and fragrant.
-
Remove the toasted oats and nuts from the oven and carefully pour them into a large mixing bowl. Add the ground cinnamon and fine sea salt, then stir everything together with a spoon.
-
In a small saucepan set over low heat, combine the butter or coconut oil with the honey or maple syrup. Warm the mixture gently while stirring until the butter completely melts and blends smoothly with the liquid sweetener.
-
Remove the saucepan from the heat and stir in the vanilla extract along with your room temperature sourdough discard. Whisk vigorously until the wet mixture is smooth, glossy, and fully combined without any lumps.
-
Pour the wet liquid mixture directly over the toasted dry ingredients in your large bowl. Use a strong spatula to fold and mix everything together thoroughly until every single oat and nut is evenly coated and sticky.
-
Let the mixture cool down for about 5 minutes so it is not hot, then gently fold in your mini dark chocolate chips or dried fruit so they do not melt away completely.
-
Transfer the sticky crunch bar mixture into your prepared baking pan lined with parchment paper. Use the back of a flat metal spoon or a measuring cup to press the mixture down extremely firm and flat into an even layer.
-
Bake in the middle rack of your oven for 25 to 30 minutes until the edges turn a deep golden brown color and the top looks nice and set.
-
Remove the pan from the oven and set it on a wire cooling rack. Allow the pan to cool completely to room temperature, then place the entire pan in the refrigerator for at least one hour to help the bars firm up properly.
-
Lift the block out of the pan using the hanging parchment paper edges. Place it on a clean cutting board and use a sharp knife to slice it into 12 even rectangular crunch bars.
Why This Recipe Is Special
-
Zero Waste Cooking: It gives a useful, delicious purpose to sourdough starter discard that usually ends up in the trash bin.
-
Easy Digestion: The fermented grains in the sourdough discard are gentler on the stomach and easier to digest than raw unfermented flour.
-
Sustained Energy: Rich in complex carbohydrates from rolled oats and healthy fats from seeds and nuts to keep your body fueled all day long.
-
No Artificial Additives: Free from refined white sugars, high fructose corn syrup, hydrogenated oils, and chemical preservatives commonly found in store snacks.
-
Incredible Texture: Offers a uniquely satisfying crunch combined with a rich chewiness that keeps every single bite interesting.
Extra Tips for Better Taste
-
Press the mixture into the pan as hard as you can before baking, because a tightly packed tray prevents the bars from crumbling when sliced.
-
To toast the oats evenly, stir them halfway through their quick stay in the oven so the coconut does not burn.
-
If you love a sweet and salty flavor contrast, sprinkle a tiny pinch of flaky sea salt over the top right after pulling the pan out of the oven.
-
Store the sliced bars in an airtight container inside your refrigerator to keep them super crunchy for up to two weeks.
-
Swap out the dark chocolate chips for white chocolate chunks, freeze dried berries, or chopped dried figs to create your own unique custom flavor combinations.
Nutrition Details
| Nutrients | Amount Per Serving | Daily Value Percentage |
| Total Calories | 210 kcal | 10% |
| Total Fat | 11 grams | 14% |
| Saturated Fat | 5 grams | 25% |
| Sodium | 55 milligrams | 2% |
| Total Carbohydrates | 24 grams | 9% |
| Dietary Fiber | 3 grams | 11% |
| Total Sugars | 10 grams | 20% |
| Protein | 5 grams | 10% |
Final Thoughts
Creating your own sourdough discard crunch bars at home is one of the most rewarding and practical kitchen projects you can undertake. It feels amazing to turn basic leftover kitchen ingredients into a wholesome, delicious treat that nourishes your body and satisfies your sweet tooth at the same time. Once you master the simple steps, you can experiment with different nuts, spices, and dried fruits to match your personal tastes. Keep a batch stored in your fridge or freezer, and you will always have a quick, healthy, and crunchy snack ready whenever hunger strikes.
Disclaimer
Every human body is unique, and individual dietary needs or nutritional results may vary based on your personal health, activity level, and specific ingredients used. The nutritional information provided in this article is a general estimate intended for educational purposes only. If you have severe food allergies, gluten sensitivities, or underlying medical conditions, please consult with a qualified doctor or certified nutritionist before making changes to your regular diet.