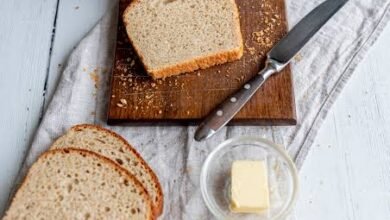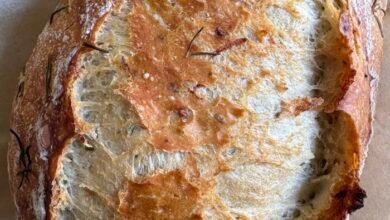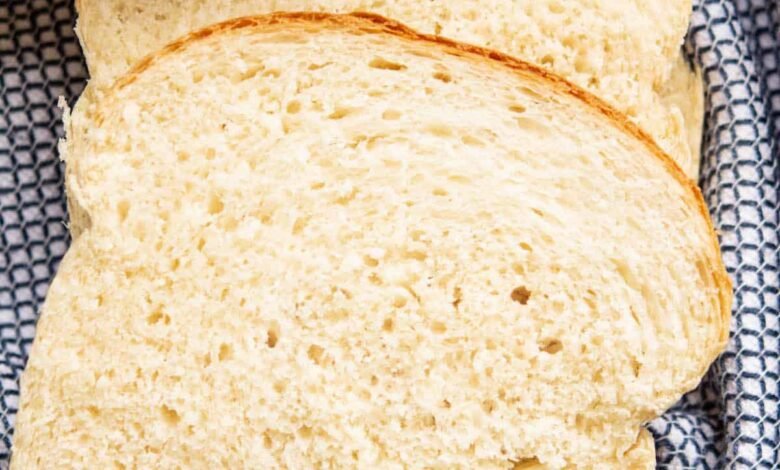
Making fresh bread at home is one of the most rewarding kitchen experiences you can ever have, especially when you are using extra starter that would otherwise go into the trash bin. Sourdough discard sandwich bread is a soft, flavorful, and incredibly tender loaf that turns simple leftover starter into a daily kitchen essential. Unlike traditional sourdough boules that require days of complex fermenting, long waiting times, and heavy crust shaping, this sandwich loaf is made to be soft, sliceable, and super easy to work with. It combines the slight tangy depth of unfed sourdough starter with the quick rising power of standard yeast or simple pantry staples. The result is a gorgeous golden loaf that holds its shape perfectly when sliced thin for lunch sandwiches or toasted dark for morning butter spreads. It is the ultimate everyday bread recipe for beginners who want the wonderful flavor of sourdough without the stress of difficult wild yeast baking techniques.
People absolute adore this loaf because it solves a massive problem that every home baker faces on a weekly basis during starter maintenance. When you keep a sourdough culture alive, you must throw away or discard a portion of the mixture before feeding it fresh flour and water. Throwing away that mixture feels like a huge waste of perfectly good food, money, and valuable flour. This wonderful sandwich loaf recipe turns that leftover liquid into pure gold, allowing you to create a high quality bakery item right in your own warm home kitchen. Beyond saving food from the garbage, people fall in love with the comforting texture of the finished bread. It has a pillowy soft crumb that does not crumble into tiny pieces when you spread cold butter or thick peanut butter across the surface. Children love it because it lacks the hard, sharp crust of traditional rustic loaves, making it ideal for daily school lunches and quick afternoon snacks.
There are so many emotional and practical reasons to bake this comforting loaf on a calm morning or quiet weekend afternoon. From an emotional perspective, filling your living space with the warm aroma of fresh baking bread creates a feeling of peace, warmth, and genuine care for your family. It brings back sweet memories of traditional baking techniques while grounding you in the simple joy of creating real food with your own hands. From a health and fitness perspective, making your own loaf puts you in total control of every single ingredient that enters your body. Commercial store bought loaves often contain strange chemical preservatives, unnecessary artificial softeners, excess refined sugars, and oils that your body does not really need. By contrast, this homemade version relies on clean ingredients, pure flour, real honey or maple syrup, and natural fermentation benefits that feel gentler on your digestive system.
Whether you are looking to save money on your weekly grocery bill or simply want to nourish your loved ones with clean ingredients, this sandwich loaf fits seamlessly into any healthy lifestyle. It gives you a wonderful feeling of creative accomplishment when you see a plain mound of dough rise up tall over the sides of your metal baking pan. You can prepare it while working from home, cleaning the house, or relaxing with a warm cup of tea on a lazy Sunday afternoon. The gentle process of kneading the soft dough can even act as a form of stress relief after a long and busy work week. Every time you slice into a fresh loaf, you will feel proud knowing that you created something delicious, soft, and wholesome out of simple ingredients and leftover sourdough discard. It is a comforting ritual that connects you to simple living, zero waste kitchen habits, and the timeless joy of baking fresh food from scratch.
Ingredients You Will Need
To create this wonderful soft sourdough discard sandwich bread, you will need a few simple pantry ingredients that you likely already have in your kitchen. Make sure all your ingredients are measured accurately for the very best results.
-
Sourdough discard: 1 cup (240 grams), unfed and at room temperature
-
Warm water or warm whole milk: 1 cup (240 milliliters), heated to roughly 105 degrees Fahrenheit
-
Instant yeast or active dry yeast: 2 and 1/4 teaspoons (1 standard package or 7 grams)
-
Honey or pure maple syrup: 2 tablespoons (42 grams) for light sweetness and yeast activation
-
Unsalted butter: 4 tablespoons (56 grams), softened to room temperature or gently melted
-
Whole milk powder: 2 tablespoons (15 grams), optional but helps create an extra soft crumb
-
All purpose flour or bread flour: 3 and 1/2 cups to 4 cups (420 to 480 grams), plus extra for dusting
-
Fine sea salt: 1 and 1/2 teaspoons (9 grams) to enhance all the natural flavors
-
Vegetable oil or butter: 1 tablespoon for greasing your mixing bowl and baking loaf pan
Step by Step Method
Step 1: Preparing Your Liquid Base and Yeast
Start by gathering all of your ingredients on a clean kitchen counter so everything is ready to use. If your sourdough discard is stored in the refrigerator, take it out about thirty minutes before you start so it can lose its cold chill. Take your water or whole milk and heat it gently until it feels warm to the touch, similar to the temperature of warm bath water. If the liquid is too hot, it will kill the yeast, so keep it comfortable and gentle. Pour the warm liquid into your main mixing bowl or the bowl of your stand mixer. Add the honey or maple syrup to the liquid and stir gently until it dissolves completely. Sprinkle the instant yeast or active dry yeast directly over the top of the warm liquid mixture. Let it sit untouched for about five to ten minutes until it forms a bubbly, frothy layer on top. This step proves that your yeast is alive, active, and ready to make your bread rise tall and fluffy.
Step 2: Mixing the Discard and Wet Ingredients
Once your yeast mixture is nice and bubbly, it is time to add your sourdough discard. Pour the cup of sourdough discard directly into the bowl with the yeast water. Add the softened or melted unsalted butter into the mixture as well. Use a wooden spoon, a silicone spatula, or a whisk to gently stir everything together until the discard dissolves into the liquid. It is completely normal if the mixture looks slightly lumpy or pale at this stage. The acid in the discard will work together with the warm liquid and yeast to create a very happy environment for gluten development. If you are using milk powder for an extra tender crumb structure, stir it in during this step as well so it distributes evenly through the liquid ingredients.
Step 3: Adding Flour and Salt
Now begin adding your flour to the wet mixture. Measure your flour by spooning it into your measuring cup and leveling it off with a flat knife so you do not accidentally add too much density. Add about two cups of flour into the bowl along with the fine sea salt. Always add the salt with the flour rather than directly onto the active yeast, as concentrated salt can slow down yeast growth. Stir the ingredients together using a sturdy wooden spoon or the paddle attachment of your stand mixer set to low speed. As the flour absorbs the liquid, a wet, shaggy dough will start to form in the center of the bowl. Gradually add another cup of flour, stirring continuously until the dough pulls away from the sides of the bowl and starts forming a loose, cohesive ball.
Step 4: Kneading the Dough to Perfection
Turn the loose dough out onto a clean, lightly floured work surface. If you are using a stand mixer, switch from the paddle attachment to the dough hook attachment. Knead the dough for about eight to ten minutes by hand or six to eight minutes in your machine on low to medium speed. When kneading by hand, push the dough forward with the heels of your palms, fold it back over itself, and turn it a quarter turn. Repeat this rhythmical movement steadily. If the dough feels overly sticky and sticks to your fingers continuously, add additional flour one tablespoon at a time. Be careful not to add too much flour, because a dough that is slightly tacky will bake into a much softer loaf. You know the dough is properly kneaded when it becomes smooth, elastic, bouncy, and no longer sticks aggressively to your hands. You can perform the windowpane test by stretching a tiny piece of dough thin; if it stretches thin enough to let light pass through without tearing immediately, your gluten is fully developed.
Step 5: The First Rise
Lightly grease a large clean bowl with a teaspoon of vegetable oil or melted butter. Shape your kneaded dough into a neat round ball and place it inside the greased bowl. Turn the dough ball over once so the top surface is lightly coated with oil, which prevents a hard dry skin from forming on top during the rising time. Cover the bowl securely with a damp kitchen towel, a silicone lid, or plastic wrap. Place the bowl in a warm, draft free location in your kitchen, such as inside an oven that is turned off with the oven light turned on. Let the dough rise for roughly one to two hours, depending on the ambient temperature of your home. The dough is ready for the next stage when it has doubled in size and leaves a gentle finger indentation when pressed lightly on the side.
Step 6: Shaping the Sandwich Loaf
Once your dough has finished its first rise, gently press your fist into the center of the dough to release excess gas bubbles. Transfer the relaxed dough onto a lightly floured surface. Gently flatten the dough into a rectangular shape using your hands, making the rectangle about eight inches wide and twelve inches long. Roll the rectangle up tightly into a log, starting from the short end closest to you. Rolling it tightly ensures that your final baked sandwich bread will not have large empty air pockets inside. Pinch the final seam tightly with your fingers to seal the log closed, and tuck the ends under neatly. Grease a standard nine inch by five inch loaf pan with butter or non stick cooking spray. Place the shaped dough log into the greased pan with the seam facing downward.
Step 7: The Second Rise
Cover the loaf pan loosely with a clean kitchen towel or a piece of lightly greased plastic wrap to keep the top soft. Place the pan in a warm spot once again to undergo its second rise. This stage usually takes about forty five minutes to one hour, depending on the warmth of your kitchen. Watch the dough carefully during this time. You want the top of the dough log to rise roughly one inch above the rim of your loaf pan, creating a smooth, rounded top crown. While the dough is finishing its second rise, heat your oven to 350 degrees Fahrenheit (175 degrees Celsius) so it is hot and ready when the loaf goes in.
Step 8: Baking the Loaf
When your bread has risen above the rim and your oven is fully preheated, remove the towel or plastic wrap from the pan. If you like a glossy, golden brown top crust, you can gently brush the top surface of the dough with a tablespoon of melted butter or milk using a soft pastry brush. Place the loaf pan onto the center rack of your hot oven. Bake the bread for 30 to 35 minutes. If you notice the top turning dark brown too quickly during the first twenty minutes of baking, loosely lay a sheet of aluminum foil over the top of the loaf to protect it. The bread is fully baked when the crust turns a rich golden color and the bottom sounds hollow when you tap it gently. An instant read digital thermometer inserted into the center of the loaf should read between 190 and 200 degrees Fahrenheit.
Step 9: Cooling and Slicing
Remove the baked loaf pan from the oven using sturdy oven mitts. Set the pan on a wire cooling rack for about ten minutes to cool slightly. Run a butter knife around the inside edges of the pan to ensure no parts are sticking, then carefully turn the loaf out onto the wire cooling rack. Stand the loaf upright and let it cool completely to room temperature before slicing into it. Although it is tempting to cut into hot bread immediately, cutting a warm loaf will trap steam inside, causing the interior crumb to become gummy and dense. Waiting at least one hour allows the internal crumb structure to set perfectly, resulting in soft, clean slices every single time.
Why This Recipe Is Special
This sourdough discard sandwich bread recipe holds a unique place in home baking because it balances convenience, incredible flavor, and practical smart cooking. Traditional sourdough baking often requires complex schedules, precise temperature control, and long fermentation periods that span several days. This recipe offers a wonderful shortcut by using your leftover starter for flavor and moisture while relying on standard yeast for a reliable and quick rise. You get the best features of both worlds: a gentle tangy flavor profile and a predictable baking timeline that fits easily into a busy modern routine.
From a health and body perspective, using sourdough discard in your baking introduces fermented flour into the dough mixture. Even though this loaf rises quickly, the pre fermented flour inside the discard brings enhanced digestibility and subtle natural complexity. Homemade bread also allows you to completely avoid chemical dough conditioners, artificial colors, synthetic flavorings, and unnecessary preservatives commonly found in commercial bread products sold in plastic bags. You feed your body clean energy made from wholesome, easy to read ingredients that support simple, healthy eating habits.
The physical texture and versatile nature of this loaf make it standout compared to standard quick breads. The addition of softened butter and optional milk powder creates a silky, soft crumb that stays fresh and soft for days without getting dry or crumbly. It holds heavy sandwich fillings like sliced turkey, crisp lettuce, juicy tomatoes, or thick peanut butter without tearing apart. At the same time, when you toast a slice in the toaster, the exterior turns delightfully crispy while keeping the inner center tender and light.
Extra Tips for Better Taste
-
Use warm milk instead of water in your initial yeast mixture to make the crumb structure even richer, softer, and more tender.
-
Brush the warm crust with additional melted butter as soon as the loaf comes out of the oven for a silky, rich top skin that stays soft.
-
Add a tablespoon of pure honey or maple syrup to the dough mixture if you enjoy a slightly sweeter sandwich bread that pairs amazingly with savory toppings.
-
Mix in two tablespoons of ground flaxseed or chia seeds during the flour stage to add subtle nutty flavor, extra texture, and wholesome fiber.
-
If your kitchen is cold, let your dough rise inside an oven that is turned off with the interior light turned on to create the perfect warm microclimate.
-
Use bread flour instead of all purpose flour if you want a slightly taller rise and a chewier texture in your finished slices.
-
Store your sliced loaf in an airtight bag at room temperature for up to four days, or freeze sliced portions wrapped tightly in foil for up to three months.
Final Thoughts
Baking sourdough discard sandwich bread is a deeply fulfilling project that turns simple everyday kitchen remnants into a beautiful, comforting staple for your family table. It bridges the gap between traditional sourdough techniques and practical daily home baking, proving that soft and high quality bread does not have to be difficult or stressful to make. Once you experience the incredible smell of a golden loaf baking in your oven and taste your first homemade toasted slice, you will never want to go back to store bought plastic bagged loaves again. Gather your simple ingredients, dust off your baking pan, use up that extra starter, and enjoy the delicious warmth of homemade sandwich bread today.
Nutrition Details
The following table provides estimated nutrition facts for one standard loaf made with this recipe, as well as calculated values per individual slice assuming a single loaf is cut into twelve equal slices.
| Nutritional Component | Total Recipe (Entire Loaf) | Per Serving (1 Slice of 12) |
| Calories | 2160 kcal | 180 kcal |
| Total Carbohydrates | 384 g | 32 g |
| Dietary Fiber | 12 g | 1 g |
| Total Sugars | 24 g | 2 g |
| Protein | 60 g | 5 g |
| Total Fat | 42 g | 3.5 g |
| Saturated Fat | 24 g | 2 g |
| Trans Fat | 0 g | 0 g |
| Cholesterol | 100 mg | 8 mg |
| Sodium | 3120 mg | 260 mg |
| Potassium | 480 mg | 40 mg |
| Calcium | 120 mg | 10 mg |
| Iron | 24 mg | 2 mg |
Disclaimer
This article and recipe are intended purely for general informational and educational purposes. Everyone’s body, digestive system, dietary needs, and health profile are different, meaning individual results and reactions to fermented foods or specific flour products may vary from person to person. If you have specific dietary restrictions, gluten allergies, celiac disease, or underlying health conditions, please consult with a qualified medical professional or registered dietitian before making significant changes to your diet or baking routine.