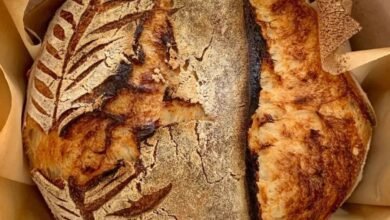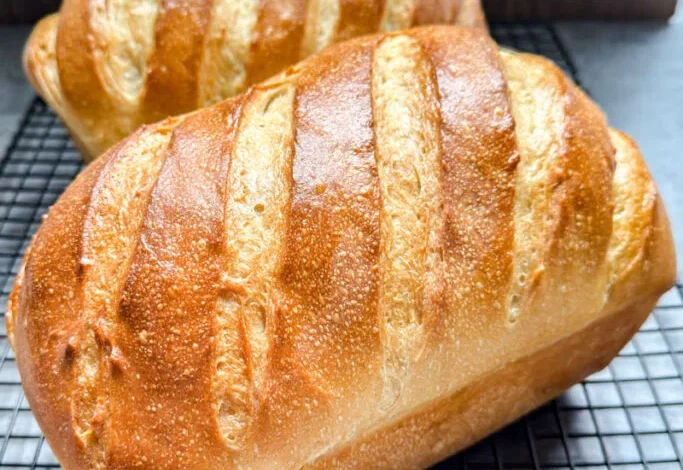
Making homemade sourdough sandwich bread is one of the most rewarding baking projects you can ever try in your own kitchen at home. This recipe brings together the classic, tangy flavor of traditional sourdough fermentation with the soft, tender crumb of a daily loaf of bread. Unlike artisan round loaves that have a very hard and crunchy outer crust, this specific loaf is designed to be completely soft from top to bottom. It bakes perfectly inside a standard loaf pan, which means every slice comes out in a neat rectangular shape that fits your toaster and holds your favorite sandwich fillings without any large holes. Baking this bread allows you to take full control over every single ingredient that goes into your daily food supply. You will not find any artificial preservatives, commercial dough conditioners, or unnecessary additives in this whole food loaf. The long and slow natural fermentation process helps break down proteins and starches, creating a deeply satisfying flavor profile that store bought loaves simply cannot match. Whether you are an experienced home baker who already keeps an active starter or a complete beginner who wants to try naturally leavened baking for the very first time, this recipe guides you through every small step with complete ease and clarity.
People all around the world absolutely fall in love with this soft sourdough sandwich bread because it offers the perfect balance between delicious flavor and everyday practical usability. Many home bakers find that rustic crusty sourdough loaves, while stunning to look at, can sometimes be too chewy or have air pockets that are far too large for spreading butter, jam, or mayonnaise. This special sandwich loaf solves that common problem completely by utilizing a small amount of healthy fat like melted butter or olive oil, which softens the natural gluten structure and creates a uniform, pillowy interior. The crust remains pleasantly light and easy to bite through, making it ideal for young children, elderly family members, and anyone who prefers a gentler texture for their morning toast. Furthermore, the incredible smell of freshly baked sourdough filling your home creates a warm, cozy atmosphere that brings immediate comfort to everyone in the house. Slice after slice, this reliable bread holds its shape without crumbling apart, allowing you to build tall double decker sandwiches, rich grilled cheese sandwiches, or simple garlic toast with absolute confidence and joy.
There are so many wonderful reasons and special occasions to bring this nutritious loaf into your regular weekly cooking routine. From an emotional perspective, slow baking serves as a grounding mindfulness practice that invites you to slow down, connect with basic natural processes, and enjoy the simple pleasure of working with your hands. From a taste perspective, the subtle sour tang pairs effortlessly with both savory ingredients like roasted turkey, sharp cheddar, and salty bacon, as well as sweet toppings like raw honey, homemade fruit jams, and creamy peanut butter. From a health and fitness standpoint, naturally fermented sourdough offers remarkable benefits for your digestive system. The beneficial wild yeasts and lactic acid bacteria break down complex gluten networks and phytic acid over many hours, making the final loaf much easier on your stomach compared to fast rising commercial yeast breads. Many people who feel heavy or bloated after eating regular white bread report feeling energized and comfortable after enjoying authentic sourdough. Packing a lunch made with this wholesome, gut friendly bread gives you a deep sense of pride and nourishment that carry you through a busy day.
Starting your own baking tradition with this soft sandwich loaf will quickly transform the way you view your daily meals and kitchen routine. When you realize how simple it is to turn four basic kitchen staples into a beautiful, golden brown loaf, you may never want to buy plastic wrapped commercial bread ever again. This recipe is designed to fit flexibly into a busy modern schedule, allowing you to perform quick mixings and foldings between your normal household chores or work tasks. Over time, as you become more familiar with how your unique sourdough starter behaves, you will build an intuitive feel for the dough, learning to read its rising cues through touch and sight rather than strict clock timers. Every single loaf you pull out of the warm oven serves as a proud achievement that you can proudly share with your neighbors, friends, and family. Gathering around the table to tear into a warm slice of fresh bread is a timeless human experience, and this gentle, nourishing sourdough recipe is the ultimate way to bring that authentic joy right into your daily life.
Ingredients You Will Need
-
Active and bubbly sourdough starter: 100 grams
-
Warm whole milk or fresh filtered water: 250 grams
-
Raw unrefined honey or pure maple syrup: 25 grams
-
High protein unbleached bread flour: 500 grams
-
Fine sea salt or unrefined mineral salt: 10 grams
-
Unsalted butter, softened at room temperature: 30 grams
Step by Step Method
-
Warm your liquid slightly until it reaches a comfortable lukewarm temperature. In a large glass or ceramic mixing bowl, combine your active sourdough starter, warm milk or water, and honey. Stir everything together using a wooden spoon or dough whisk until the starter dissolves completely into a milky white mixture.
-
Add your unbleached bread flour and fine sea salt directly into the bowl with the wet ingredients. Mix well with your hands or a sturdy spatula until all the dry flour is fully incorporated and no dry spots remain anywhere in the bottom of the bowl.
-
Cover the mixing bowl with a clean damp kitchen towel or a reusable bowl cover. Let the shaggy dough rest peacefully for roughly thirty minutes. This short rest period, known as an autolyse, allows the flour particles to absorb the liquid deeply and helps the natural gluten network begin to form smoothly on its own.
-
Add the softened unsalted butter directly to the dough. Knead the butter into the dough using your hands by squeezing and folding until the fat is fully absorbed. The dough will feel a bit slippery at first, but it will quickly smooth out into a soft, elastic ball after a few minutes of steady mixing.
-
Perform a series of stretch and folds every thirty minutes for the next two hours. To do a stretch and fold, reach down to grab one side of the dough, pull it gently upward without tearing it, and fold it over the top toward the center. Rotate the bowl ninety degrees and repeat this action on all four sides.
-
Cover the bowl and let the dough undergo its main fermentation at warm room temperature. Allow the dough to rest until it expands in volume by roughly fifty to seventy five percent, feels light and puffy to the touch, and shows small air bubbles resting beneath the smooth top surface.
-
Lightly grease a standard nine by five inch metal loaf pan with a small amount of butter or neutral oil. Lightly dust your clean kitchen counter with a tiny bit of flour, then gently tip your fermented dough out of the bowl onto the prepared surface without deflating it roughly.
-
Shape the dough by gently pressing it out into a flat rectangular shape. Fold the left side toward the middle, then fold the right side over the top like a letter. Roll the dough up tightly from the bottom to the top to form a smooth log, creating light surface tension along the outer skin.
-
Place the shaped dough log carefully into your greased loaf pan with the smooth seam facing down toward the bottom. Cover the loaf pan loosely with a damp towel or plastic wrap to prevent the top skin from drying out during the final rise phase.
-
Allow the shaped loaf to undergo its final rise at room temperature until the top of the dough rises about one inch above the rim of the metal loaf pan. Depending on your room temperature and starter strength, this final rise will usually take anywhere between three to six hours.
-
Preheat your baking oven to 375 degrees Fahrenheit or 190 degrees Celsius well in advance so it is completely hot before the bread goes inside. Place an oven rack in the middle position to ensure the loaf cooks evenly from all directions.
-
Brush the top of your risen loaf gently with a little bit of melted butter or milk if you desire an extra soft and shiny crust. Place the loaf pan carefully into the center of the preheated oven.
-
Bake your sourdough sandwich bread for thirty five to forty minutes. The bread is fully cooked when the top crust turns a deep golden brown color and the loaf sounds hollow when you gently tap on the top surface.
-
Remove the loaf pan from the hot oven using oven mitts. Let the bread sit safely in the metal pan for five minutes, then gently turn the loaf out onto a wire cooling rack.
-
Allow the bread to cool completely to room temperature for at least two hours before slicing into it with a sharp serrated bread knife. Cutting into hot sourdough too early causes internal steam to escape rapidly, which can make the inside texture feel gummy instead of soft.
Why This Recipe Is Special
This unique sourdough sandwich bread stands out because it combines natural digestive health benefits with a user friendly, soft texture. Standard commercial sandwich breads often rely on fast rising baker’s yeast along with chemical additives to achieve a quick rise, leaving gluten protein structures largely unbroken. In contrast, this recipe relies entirely on wild cultures that slowly ferment the grain over many hours. This extended fermentation neutralizes phytic acid, an anti nutrient that can block mineral absorption, making minerals like magnesium, iron, and zinc much easier for your body to process. Additionally, the gentle sour flavor gives every bite a complex depth that mass produced store options simply cannot recreate. The inclusion of a small amount of healthy fat and natural sweetener softens the internal gluten structure, ensuring that you get clean, soft slices that do not crumble when you build heavy lunches or toast them for breakfast.
Extra Tips for Better Taste
-
Use whole milk instead of plain water for your main liquid if you prefer an exceptionally soft, rich, and sweet internal crumb structure.
-
Replace the white bread flour with up to twenty percent fresh whole wheat flour or rye flour to add a delicious, earthy, nutty flavor profile.
-
Brush the top of the hot loaf with a generous coat of raw honey butter as soon as it comes out of the oven for a heavenly, rich crust finish.
-
Mix two tablespoons of roasted garlic powder or dry Italian herbs directly into the flour for an incredible, savory twist on your daily sandwich bread.
-
Store your fully cooled bread in a breathable linen bag or an airtight container at room temperature to keep the crumb perfectly moist for days.
-
Slice the whole loaf ahead of time and store the individual slices in the freezer, pulling out single pieces directly to toast whenever you need them.
Final Thoughts
Baking your own sourdough sandwich bread is a wonderful journey that brings health, rich flavor, and personal satisfaction straight into your home kitchen. Taking simple ingredients and turning them into a soft, golden loaf offers a comforting break from our fast paced world. As you practice this recipe, you will build confidence in working with natural wild starters and timing your bakes according to your own daily schedule. Share a warm slice with your family, pack a wholesome sandwich for work, or simply enjoy the comforting aroma of fresh bread baking in your oven. Happy baking to you, and may your kitchen always be filled with the wonderful smell of homemade sourdough!
Nutrition Details
| Nutrient Name | Total Whole Loaf | Amount Per Single Slice |
| Serving Size | 1 Whole Loaf | 1 Slice (1 of 12) |
| Total Calories | 2150 kcal | 179 kcal |
| Carbohydrates | 410 g | 34.1 g |
| Dietary Fiber | 16 g | 1.3 g |
| Total Sugars | 22 g | 1.8 g |
| Protein | 62 g | 5.1 g |
| Total Fat | 28 g | 2.3 g |
| Saturated Fat | 16 g | 1.3 g |
| Cholesterol | 65 mg | 5.4 mg |
| Sodium | 3900 mg | 325 mg |
| Potassium | 650 mg | 54 mg |
| Iron | 24 mg | 2.0 mg |
Disclaimer
The nutritional values provided in the table above are approximate estimates calculated based on standard ingredients and a twelve slice yield per loaf. Actual nutritional values may vary depending on the specific brands of flour, milk, butter, and sweetener you choose to use in your own kitchen. Furthermore, everyone’s body, metabolism, and digestive system are entirely unique, meaning individual health results and digestive comfort from eating naturally fermented sourdough bread may differ from person to person. If you have specific dietary restrictions, severe gluten sensitivities, or underlying medical conditions, please consult with a qualified healthcare professional or certified nutritionist before making significant changes to your daily diet.